Finally got a chance to work on the Shin Musha this weekend, and here are the pictures I've taken before the build. Master grades are definitely a world apart from my usual High Grades; I am 8 hours in as I write this and I've only built the upper body.
The Manual
First up, we have some shots of the inside of the manual. Similar to the Masurao, there's plenty of poorly translated English all over.
I don't really care much for the manual as long as the instructions are clear, but you have to give TT Hongli some points for effort.
 |
| Origin of the Shin Musha |
 |
| 16 runners; this is definitely going to take a while. |
The Runners
I've decided to take photos of the runners before building to show off the plastic. I was expecting the plastic to be so-so going into this build, but I was pleasantly surprised that they do look quite good for bootlegs.
In terms of the material itself, it definitely feels more fragile compared to the original - at least it would look good on my shelf. I hope.
 |
| Shiny |
Here we have a shot of the polycaps. Compared to original Bandai kits, the polycaps for bootlegs are usually shiny and smooth as you can see here. I was expecting a lot more polycaps for a master grade but this isn't really a bad thing.
Another runner. In all the bootleg kits I've assembled, I find that they grey pieces are almost always the best quality. Color could be compared to an original kit, and the plastic feels sturdy. If they could do this for the rest of the runners..
 |
| "Gold pieces" |
I had to rethink this purchase multiple times because of this. I've seen enough reviews of TT Hongli kits with gold plating to know that these have always disappointed.
Removing these pieces from the runner are usually problematic. Instead of one have solid gold-plated piece, you'd have one with tiny discolorations where it was connected to the tree.
The 'gold' pieces for the Shin Musha are more of a shiny brown/bronze than gold. Hopefully they won't look that bad when they're off the runner and buffed.
We get very nice matte white and red colors for the suit's armor which is a plus - I never liked shiny plastic for gunpla.
However, unlike the grey pieces, quality drops here. The pieces are very thin so be very careful when working with your hobby knife when trimming down nubs as it is very easy to shave off the plastic.
Shots of the black pieces. Sadly, we get shiny pieces here. Most of these will be covered up by the armor when it's done though so it's no big deal. Same with the previous runner, be very careful when working on these due to plastic quality.
More of the red parts of the kit used for armor. The Shin Musha's skirt armor is very detailed. In the upper right of the second photo above, we can see that the front skirt is actually made up for 4 pieces allowing it to wave. Once the kit is built, it'll make sense.
More gold pieces. I've already broken my no glue rule when I build the Masurao; hopefully I won't have to learn painting kits once I complete this kit.
More grey pieces used for the inner frame. If only the rest of the runners had the same quality as they grey ones.
The Actual Build - The Torso
I really wanted to build the inner-frame first and showcase the quality of the material and the articulation. However, this being my first master grade, I decided to do things by the book and follow the manual.
 |
| The runners we will be using for the torso. A master grade's torso uses more runners than a complete High Grade. |
 |
| The main torso and the pegs that would eventually connect the shoulders to the body. |
 |
| A photo of the interior of the torso with the shoulder pegs in place. The pegs provide more than 90 degree upward movement at the shoulders. |
 |
| The assembled torso demonstrating shoulder movement. Of course, this will be limited once we build the surrounding armor. |
 |
| Adding more detail and covering up the inner frame for the torso. Preparing the neck piece for the head unit. |
 |
| Put them all together. Looking quite good. |
 |
| A view from the back. |
 |
| A better shot of the front of the torso showcasing more entry points for additional armor pieces. |
 |
| A view from the top. |
 |
| First set of gold parts that will go on the kit. As expected, there will be discoloration at the points where you remove them from the runners. |
 |
| First set of gold pieces in place. Not too bad. |
 |
| Parts for the waist assembly and additional pieces for detail - gold plates pipes, and front vents. |
 |
| Looking good. |
The Head
From the reviews I've seen, the biggest difference between bootlegs and the original (other than the quality of course) can be seen in the quality of the head. While the reviews of this bootleg Musha have been positive, I worry.
Source: I have a high grade TT Hongli Strike Noir that looks... Chinese. The kit's body is perfectly fine, but I can't take it seriously because of the head unit. Expect a post on this.
 |
| A dedicated runner just for the head unit. |
 |
| First set of pieces for the head and the tiny sticker sheet that comes with the kit. Very happy about that; less stickers, more color separation. |
 |
| Applying the eye and front camera stickers. Quality of bootleg stickers have always been bad, but the Musha's turned out to be quite good.. as they actually stick. |
 |
| Another shot of the partially completed head with stickers. Showing a bit of goofiness here. The red under the eyes seems a bit to big giving it a 'surprised look'. Hopefully this will change once completed. |
 |
| Here we go. Definitely looking better than before - at least from this angle. |
 |
| Another angle. The sticker for the head was one big piece, I had to cut it manually before applying as you can see here. I'm really put off by that orange. It should be red. |
 |
| A shot from the back; a view at the rear camera sticker. Had some trouble getting it in there. |
 |
| Head unit looking good. |
 |
| Samurai armor for the back and side of the head |
 |
| Another shot of the head armor pieces. |
 |
| Rear view of the head unit with the armor pieces in place. |
 |
| The additional armor really gives it that samurai-look. Though I never did get the point of those ear-armor things on samurai armor. |
 |
| Another shot of the head unit from a different angle. With the top visor, it definitely reduces the head's surprised look. |
 |
| Then I had to apply the rest of the stickers and ruin it. Why is it orange and gold? |
 |
| I am definitely going to remove these. The Gundam's signature V-fin was also added. |
 |
| The completed head unit. |
The Arms
I was really excited to finally start working on sections of the kit that actually move. Will it deliver in terms of articulation?
 |
| Again, more runners than a high grade. |
 |
| Arm pieces. |
 |
| First signs of movement. Definitely beats out any of the kits I've assembled in terms of articulation. Look at that bend. Articulation delivered. |
 |
| Hopefully it'll be able to still do this once all that samurai armor is installed. |
 |
| Hand assembly. Separate thumb and pointing finger. The other three are molded together but you can separate them. |
 |
| The assembled arm. There's a peg on the arm to help in holding its weapons. I find that the thumb tends to fall off too easily but it's not that bad. |
 |
| Outside of the hand. I still think the Masurao's hands are better at giving off samurai-esque feel, but it's just the way the kit is designed. |
 |
| Bang! |
 |
| Wrist and elbow armor/details. |
 |
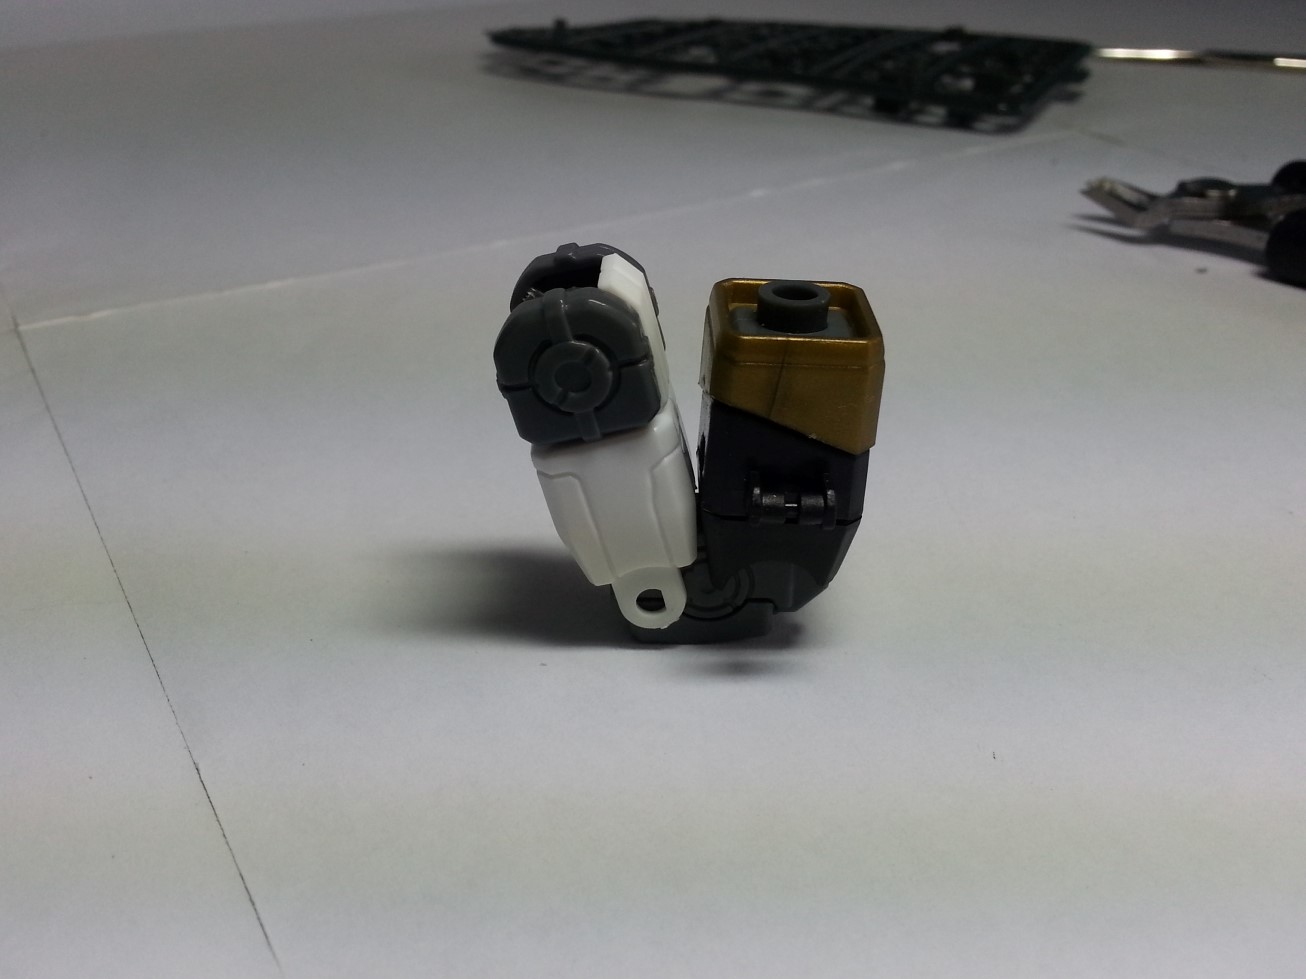
| Base arm completed. |
 |
| A shot of the elbow detail. Pretty good. This shot also reveals the problem with the gold pieces. See they grey smudge? That's where the runner used to be. |
 |
| Left and right base arms completed. |
The Shoulders
We've got the torso and arms, obviously we need the parts to make come together. Here, we'll also be seeing some of the samurai armor pieces go into place.
 |
| Shoulder parts. |
 |
| Assembled shoulder skeleton. |
 |
| Went ahead and built one of the shoulders first. Here we have a shot of the various parts that go into the shoulder. |
 |
| The completed shoulder pieces. Gold and red make for a good combination. |
Upper Body - Putting it all together!
We have the torso, head unit, and arms. I will be closing part 1 of this build with the completed photos of the base body (no samurai armor). So far, really loving the kit, and enjoying working on this scale. I may have to graduate to working purely on master grades sooner than I thought.
Up next, the lower body, armor, and hopefully the completed kit!
 |
| For a bootleg kit, even with just the upper body and no samurai armor, this thing looks amazing. Those head unit stickers really have to go though, but overall not too bad. |
 |
| Looks really good from this angle. Check out that 'shine' on the gold pieces. |
 |
| Head looks kinda goofy from this angle. It's the red highlight underneath the eyes. |
 |
| A shot from the back; no backpack for now. |
 |
| See you in part 2! |


0 comments:
Post a Comment